Monday, November 4, 2013

Things I love...

I don't know what it is about these photos, but I love everything about them...


Thursday, October 31, 2013

Happy Halloween!

Here is my advice for the easiest and least expensive Halloween party decorating.

All that you need to do is take a trip to you own linen closet and then a dollar store.

What's involved:

1) White bed sheets- Remove all the accessories from the room (i.e., only keep the main pieces of furniture in the room) and drape all the furniture pieces with your white bed sheets. Allow the sheets to pool on the floor around the furniture.


2) Faux "cob-webs"- Stretch the dollar store "cob-webbing" around each of your pictures, mirrors and anything else stationary in the room.


3) Spiders- Place dollar store, plastic, black spiders in groups around the room. For the best effect, place them on top of the white white sheets.


4) Mice silhouettes- Print off the free online mice silhouettes and place them on the baseboards and stairs around you house.


Sunday, October 27, 2013

Pumpkin Carving Dinner Party


Every year, Stuart and I throw a Halloween costume party the Saturday before Halloween. This year, since we have been so busy with the move and the new jobs, I decided to scale it back and have a low-key pumpkin-carving dinner party instead.
To be fair, the idea was not my own but "borrowed" from Apartment Therapy. (We even did the sweet potato/ potato bar for dinner.) 

What a success! 

Here's what's involved:

1)  Decorations- I did not go over board with decorations. Just a simple skull center piece on the table, a black tablecloth, some orange bowls for the sides, a few small, plastic spiders on the plates and napkins, a spider web bowl for the Halloween candy (a must!) and some plastic bats on the windows. Took me no time at all to set-up but still made the evening feel festive (if that's the right word?).  

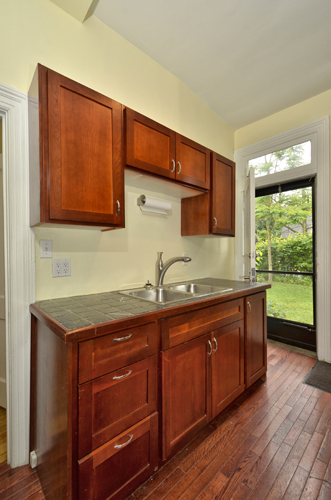
2) Pumpkins for carving- We did one large pumpkin per couple. Everything was set-up before anyone arrived. I divided our kitchen counter into work spaces and laid out newspaper under each pumpkin. Each work space had a pen for marking, a knife for cutting and a bowl for scooping out the pumpkin. An iPad was passed around to give everyone a chance to look up pumpkin carving ideas on the internet.

3) Dinner- We chose to go with a mostly Mexican-inspired sweet potato bar consisting of sweet potatoes, potatoes, vegetarian chili, sauteed mushrooms, chopped green onions, shredded cheddar cheese, sour cream, blue cheese, a variety of hot sauces, garlic bread and salad. Everything was put out separately and everyone was instructed to make up their own combinations of ingredients.

I had everyone arrive at 5pm and from start to finish the pumpkins took us about 2 hours to carve. The chili was made earlier in the day and was continuing to cook during the pumpkin carving. Almost everything else had been prepared ahead of time, except the baking of the sweet potatoes and potatoes and the sauteing of the mushrooms.The party turned out to be an excellent alternative to the usual Halloween costume party! Added bonus- now we all have pumpkins to display for the trick or treaters on Halloween night!   

Tuesday, October 22, 2013

On the hunt for...

Now that we are in the new apartment and have had a good start at decorating it, we still have lots of work to do but their are a few things that I am hunting for.

For the living room:

1) a unique, traditional style armchair- with queen Anne legs, a light coloured fabric (although I am willing to have it re-upholstered and lighter legs (and I am willing to paint them myself) 


2) a large, metal wall clock


3) an old, wine crate to hold firewood (even though our fireplace is ethanol...)


For the dining room:

4) a traditional style, silver serving tray- to sit on the dining room sideboard and hold the scotch decanter and scotch glasses


For the bedroom:

5) a wood dresser- with queen Anne legs and I will paint it dark grey (I can't imagine I will actually find it in the colour I want)


6) a wood bench with cushion seat- for the foot of the bed, which I will paint the legs dark grey and recover the seat with a fun yellow and dark grey fabric
   

7) a fun yellow and grey fabric- for a lumbar pillow for the bed, the bench cushion at the foot of the bed and a roman blind for the small window in the bedroom


Friday, August 16, 2013

Mid Century Modern Wood Armchair

Anyone who has ever read this blog knows that I have been looking for a mid century modern wooden armchair for a while. Ever since I passed up this opportunity, I have been kicking myself! Finally, I decided to be proactive and posted a "wanted" ad on one of the online thrift stores that I frequent and someone has contacted me! Here is my new chair:


I haven't picked it up yet- but the cushions look like they are in good shape. I intend to have them re-upholstered in a lighter coloured fabric but at least their is no rush on that. And I am thinking that the chair is walnut, a medium stain and in great shape! Yay!

Monday, August 12, 2013

Kitchen Lighting

The kitchen of our new apartment can really use some love. It is functional but is also well worn and has some wasted space. We intend to completely renovate it. My plan is to create a kitchen with a french bistro style, similar to below... except with dark grey cabinets.


What I cannot decide on is the lighting. It is a small galley kitchen with very high ceilings and could use a nice medium to large pendant. I am not sure what style of fixture to go with- modern or traditional. The rest of the apartment is a mix of the two styles, so either style will work. Here are my choices:


Traditional- black


Modern-black


...or modern-stainless steel


Normally I would be practical about the decision and just go with the fixture that costs the least, but all of the above cost roughly the same, reasonable price! Maybe I should let Stu decide? Probably not.

Thursday, July 25, 2013

Parisian Patio Style

The best part about having a new apartment is that I have another place to decorate!

Here's some of my inspiration photos for the 10' x 10' patio. I'm calling the style "Parisian Patio".


Monday, July 15, 2013

The New Apartment- The Before Photos

As promised- here are some pictures of our new apartment. FYI- We have not moved in yet so the furniture in the photos is not ours.

Building front entry


Our patio


Kitchen 


Living room


Dining room


Bedroom


Bathroom


Thursday, July 11, 2013

New Apartment- Finally!

I have been talking for a long time about us moving into another apartment and it is finally happening. Both Stu and I have new jobs (in a new city) and we bought a condo in an old bankers mansion that was renovated into 7 apartments. In the photo below our place is the main floor left hand side of the building. More pictures and details to follow.

Wednesday, June 19, 2013

Water Hyacinth Baskets

This may make me sound a little crazy but that's okay.
I was given a water hyacinth basket for my bridal shower a long time ago. It has been in my bathroom for years and was starting to show its age. So one day I decided that it would look new and fresh if I put a coat of stain on it in a little darker colour than the original. So I stained it and I was shocked to see that it turned out great! So, fast forward a few months and JYSK is clearing out the baskets below.


I love a good deal and I did not pay any more than $5 for any one of them! Just a side note- I also love that water hyacinth is a green choice since it growing time is quite short, they grow like a weed (actually are quite problematic in some areas) and the fibers are strong.

I used the Minwax Wood Finish stain in dark walnut (below) and put a single coat on the outside and inside of each basket using a paint brush. FYI- This is an oil product so you will want to do the staining in a sheltered (they take at least a few days to dry depending on the humidity) and well ventilated area (I did it in my garage).   
  

The finished product is worth the effort!


When we move into our new place I will take a picture of them in their rooms. I think the darker colour stain just takes them up a notch.


Wednesday, June 5, 2013

Sarah Richardson Design Website- New!


Sarah Richardson Design has launched a new website and it is definitely worth checking out. She has included lots of portfolio (i.e., inspiration) photos and even an outtake reel from her various shows and television appearances. 
Just to give you a little taste...

Bathroom- Before

Bathroom- After