While our brief time in a condo was lovely... I do not think that condo life is for us. So we bought a beautiful little cottage just around the corner.
The Before Photos (with someone else's things inside it...)-
The house from the street... lots of curb appeal!
The front vestibule... surprisingly large but no built-in closet.
The dining room... really good size with terrific floors and trim.
The living room...
The kitchen... needs some tlc. Floors have to go and the wall colour is not working for me.
The eat-in kitchen... lots of unrealized potential. That cabinet has to go!
The back porch... clearly a prevously underused space. Would make a perfect and functional mudroom. Lots of built-ins.
The master bedroom... small but functional. Closet needs a door!
Bedroom #2... again small but functional. Wallpaper is going!
The front porch... the floorboards needs to be sanded but everything else is in good shape!
The garage... really cute little space!
The bathroom... panda window...hmmm?
The backyard... long, well landscaped and maintained. Basically all you can ask for.
Sunday, May 24, 2015
Thursday, May 21, 2015
What's Left for Jenn's New Place
Well I haven't posted most of the after photos for Jenn's new place yet but they are on their way. Other than Jenn's master bedroom we are getting to the finishing touches everywhere else in the house... and it has really come a long way!
Here is a list of the final missing or unfinished elements.
1) Finish the front closet. Not much needs to be done here but take down the old cheap looking hooks and put up the nicer (already purchased and in the house) hooks. Maybe even take down the old closet pole in lieu of the new hooks.
2) Add big peace lily to the living room. Not only do they look great and let you know when they need to be watered but they also clean the air in your home. Love peace lilies. The pot is already there but still needs to be painted cream.
3) Paint all remaining elements that need to be cream e.g. coffee table, plant pot and saucer, magazine stand, bench, curtains rods, etc. I think a painting party is in our future...
4) Add a lovely white floor lamp to the living room. The floor lamp she currently has is really ugly and darkens the room more then anything else.
5) Find a thrift coffee table (preferably with a lower shelf for computer/television set-up) and paint it cream. Something similar to this:
6) Add bamboo blinds to the front window for extra privacy and their good looks. I especially love when they are hung with cream curtains (which these will be).
7) Remove the old phone jack from the kitchen wall then plaster, sand and paint.
8) Remove the awkward shelf above the kitchen peninsula.
9) Finish the mini mud room in the kitchen (at the back door).
10) Put up the new curtains for the patio doors and hem them... actually hem all the curtains in the house.
11) Start and finish jenn's master bedroom makeover.
12) Come up with a vignette for the landing at the top of the stairs.
13) Do something with the very blue (but newly renovated) bathroom.
14) Hang the closet door in the girls room.
I think that covers everything!
The unfinished basement needs a ton of work but that is another story...
Here is a list of the final missing or unfinished elements.
1) Finish the front closet. Not much needs to be done here but take down the old cheap looking hooks and put up the nicer (already purchased and in the house) hooks. Maybe even take down the old closet pole in lieu of the new hooks.
2) Add big peace lily to the living room. Not only do they look great and let you know when they need to be watered but they also clean the air in your home. Love peace lilies. The pot is already there but still needs to be painted cream.
3) Paint all remaining elements that need to be cream e.g. coffee table, plant pot and saucer, magazine stand, bench, curtains rods, etc. I think a painting party is in our future...
4) Add a lovely white floor lamp to the living room. The floor lamp she currently has is really ugly and darkens the room more then anything else.
5) Find a thrift coffee table (preferably with a lower shelf for computer/television set-up) and paint it cream. Something similar to this:
6) Add bamboo blinds to the front window for extra privacy and their good looks. I especially love when they are hung with cream curtains (which these will be).
7) Remove the old phone jack from the kitchen wall then plaster, sand and paint.
8) Remove the awkward shelf above the kitchen peninsula.
9) Finish the mini mud room in the kitchen (at the back door).
10) Put up the new curtains for the patio doors and hem them... actually hem all the curtains in the house.
11) Start and finish jenn's master bedroom makeover.
12) Come up with a vignette for the landing at the top of the stairs.
13) Do something with the very blue (but newly renovated) bathroom.
14) Hang the closet door in the girls room.
I think that covers everything!
The unfinished basement needs a ton of work but that is another story...
Tuesday, May 5, 2015
Small Cool
I love the Small Cool Contest at Apartment Therapy and this year is off to a bang! Check out this amazing tiny space... and there are only 9 entries so far. I think I found my winner!
Monday, May 4, 2015
Gallery Walls- Spaced Out or Tightly Packed?
So I am working on my apartment master bedroom gallery wall. It will be quite large spanning one entire side of the room. I have frames up there. It is a lot of frames... some new and some old (but painted to match). I am now trying to decide whether I prefer the frames to be tightly packed or to be spaced out... or a mix of the two...
loosely packed (with some variation)
tightly packed (with mostly large frames)
somewhere in between (with a little bit of everything)
hmmm...
loosely packed (with some variation)
tightly packed (with mostly large frames)
somewhere in between (with a little bit of everything)
hmmm...
Thursday, April 9, 2015
Girls Bedroom- Before & After
My nieces room is finally finished. I'm (and she and my sister are) really happy with the end result.
Before- It was a tiny bedroom packed with unwanted furniture and a double bed. The walls were cream with a grouping of large purple hearts??
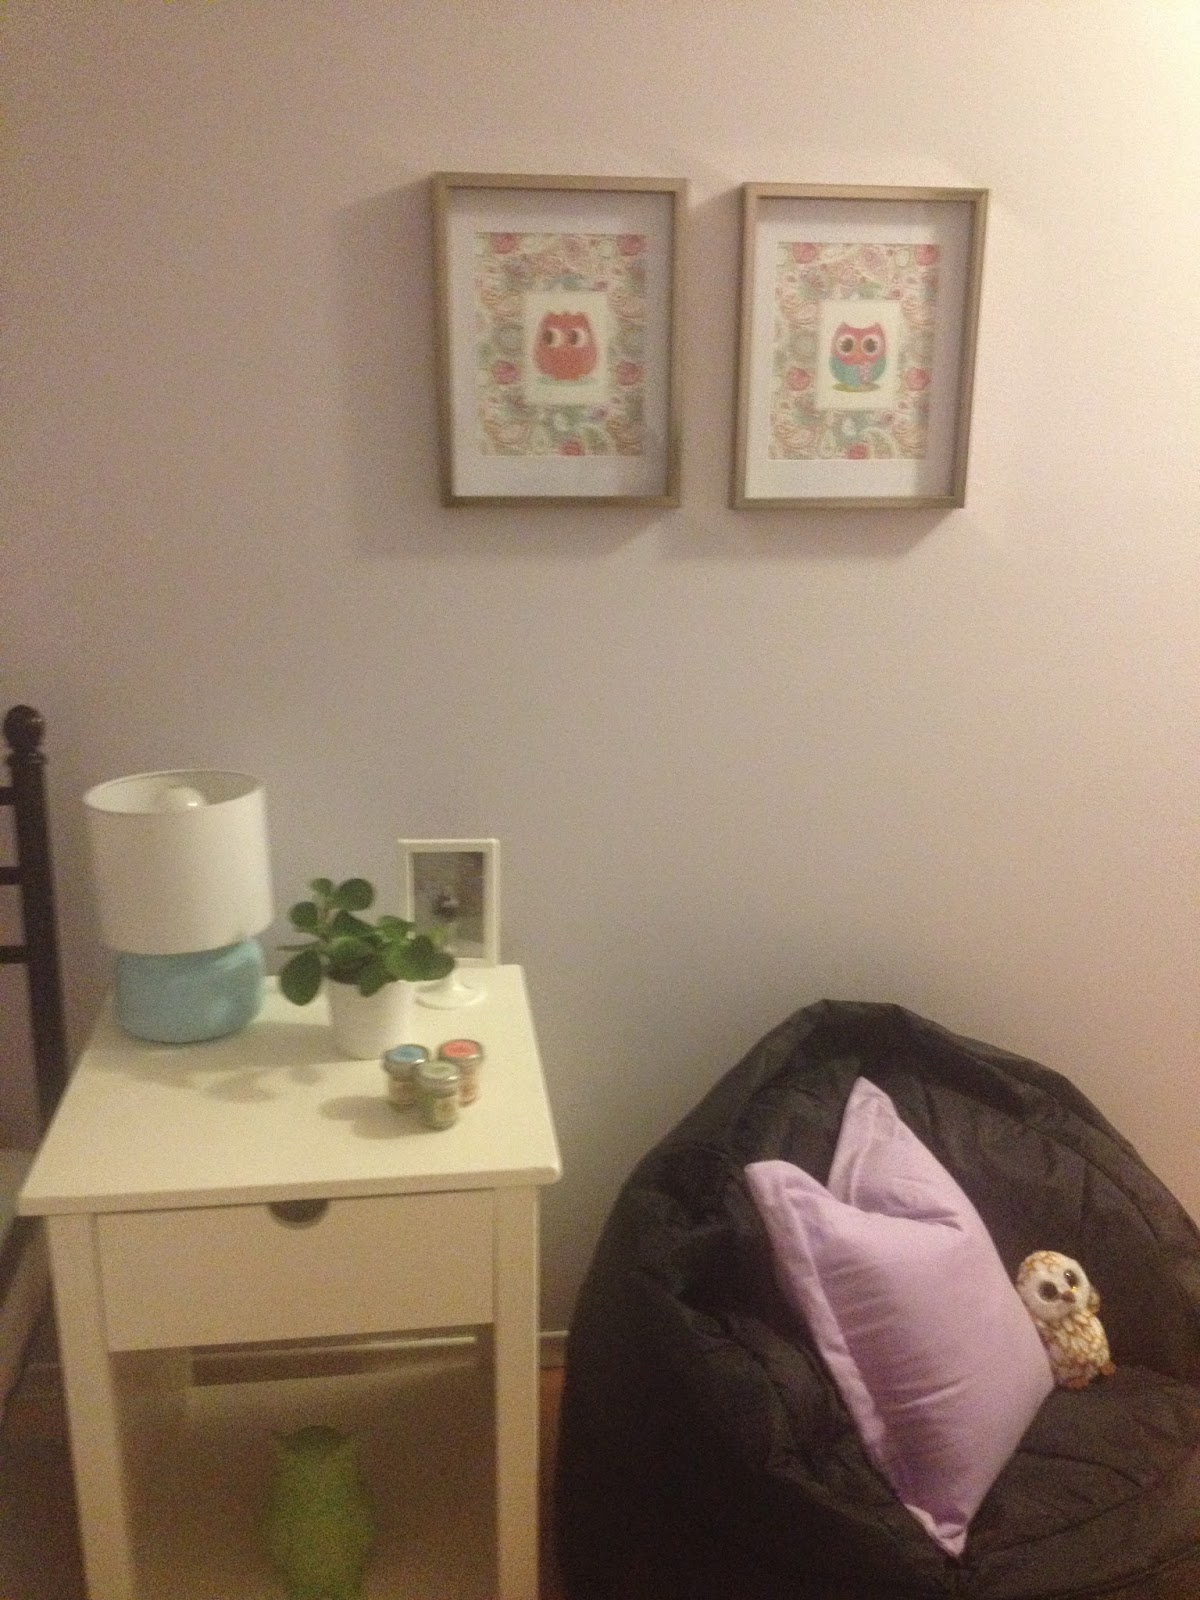
After- So my pictures aren't the best 1) I'm not a great photographer and 2) the photos were taken at night and aren't sufficiently lit. Either way, the walls are lavender. The inspiration for the room colour scheme came from the pastel paisley background of the 2 owl pictures I made. All the furniture was bought via online thrift for really reasonable prices. I painted the dresser and bedside table myself. I made all the art work (including the flag banner) and had it printed at a big box store on heavy weight paper for a small fee. Altogether, I think it looks great and, most importantly, so does she!
Before- It was a tiny bedroom packed with unwanted furniture and a double bed. The walls were cream with a grouping of large purple hearts??
After- So my pictures aren't the best 1) I'm not a great photographer and 2) the photos were taken at night and aren't sufficiently lit. Either way, the walls are lavender. The inspiration for the room colour scheme came from the pastel paisley background of the 2 owl pictures I made. All the furniture was bought via online thrift for really reasonable prices. I painted the dresser and bedside table myself. I made all the art work (including the flag banner) and had it printed at a big box store on heavy weight paper for a small fee. Altogether, I think it looks great and, most importantly, so does she!
Wednesday, April 8, 2015
Re-upholstering A Thrift Find Occasional Chair
So I bought this chair at least 5 years ago. I spray painted it then and ripped off the upholstery (which was not nice) thinking that this would rush me to re-upholster it.
Flash 5 years into the future and I finally just got around to re-upholstering it. Mind you it was still sitting in my living room all this time... and people were sitting on it.
Steps to reupholstering:
1) I created a paper template to use to cut the foam.
2) Cut the fabric to fit over the foam and down to be tacked onto the chair itself.
3) Fold the corners of the fabric around the foam and chair legs.
4) Using two people to hold the fabric tight, tack the fabric in place all around the chair.
5) Use a glue gun and glue the trim over top of the tack heads.
Finished product- Beautiful! I am actually really impressed with the how it turned out... I was very skeptical in the beginning. It was more work then I had planned but the result was worth it. After everything it cost about ~ $70 to re-upholster.
Flash 5 years into the future and I finally just got around to re-upholstering it. Mind you it was still sitting in my living room all this time... and people were sitting on it.
Steps to reupholstering:
1) I created a paper template to use to cut the foam.
2) Cut the fabric to fit over the foam and down to be tacked onto the chair itself.
3) Fold the corners of the fabric around the foam and chair legs.
4) Using two people to hold the fabric tight, tack the fabric in place all around the chair.
5) Use a glue gun and glue the trim over top of the tack heads.
Finished product- Beautiful! I am actually really impressed with the how it turned out... I was very skeptical in the beginning. It was more work then I had planned but the result was worth it. After everything it cost about ~ $70 to re-upholster.
Sunday, March 29, 2015
Girls Room Inspiration
So today is the big day. Jenn and I are finishing my niece's room. Before I post the before and after pictures, here are some of my inspiration photos for the room.
In this room I loved the idea of wall art matching fabric used in the room.
In this room I loved that they painted out the bracket legs in the fuchsia.
In this room I love the flag banner.
She asked for pastel paisley and this was what I found and used as my jumping off point...
In this room I loved the idea of wall art matching fabric used in the room.
In this room I loved that they painted out the bracket legs in the fuchsia.
In this room I love the flag banner.
The next three photos are all of the same room and are all fantastic! Love the hits of yellow!
She asked for pastel paisley and this was what I found and used as my jumping off point...
Subscribe to:
Posts (Atom)