Sunday, October 24, 2010

Back Yard- Before & After

Now that the summer is over and most of our big outdoor jobs are complete I want to share the exterior transformation.

Before-


After- Basically we resided the house, garage and bunkie, replaced the windows in the livingroom with doors, finished the patio, created gardens around the property and built a vegetable garden, new dock and deck. Four years worth of work- well worth the effort. Only jobs left- rocking the shoreline, replacing the garage door and finishing the driveway- all things that will have to wait till next spring.


Wednesday, October 20, 2010

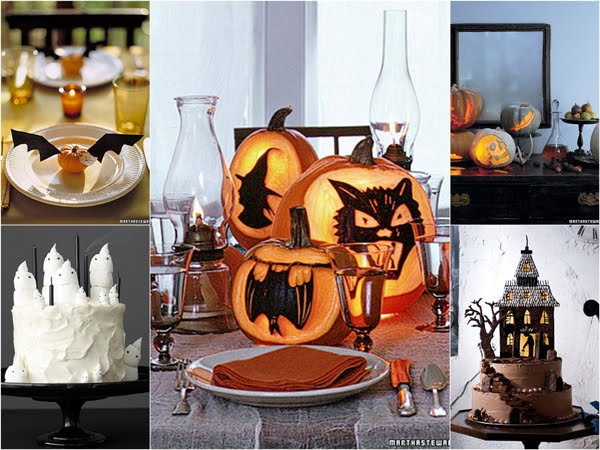
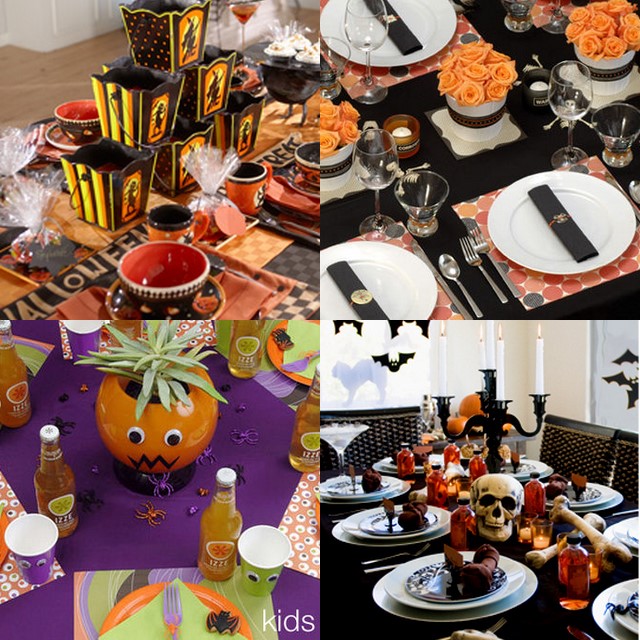
Halloween Entertaining Inspiration

I am in the process of planning a halloween party on a tight budget. My goal is to get all the decorations and our costumes for under $40 total. So far I am doing quite well and I intend to share the finished product once the party has come and gone. In the meantime, I found some inspirational photos that I thought I would share.


The above idea is a personal favorite of mine. Inexpensive and effective- what's not to love?


Monday, October 18, 2010

My Living Room Update

Although I loved the orange pillows that Jenn made for me, I was never quite sure about the colour itself. Well in the end I choose to go with a light blue colour. Now that I have a sewing machine myself it is too easy for me to change things up on a whim. Here is how the living room (and surrounding areas) look with the new accent colour.


Wednesday, September 29, 2010

Decorating Your Living Room- Part 2

Above is a storyboard that I came up with for our example open concept space. In it I have highlighted the fixed elements in the room and possible accent colours based on the pillow fabrics. Below I describe the thinking behind my choices.

Some things to note...
First- Before you begin shopping measure your space to make sure the furniture you find will actually fit.
Second- Have a budget in mind for all furniture pieces and only look in stores that fall within that budget.

Step 3- Choosing a sofa.

I suggest starting with the largest piece first i.e., the sofa. When it comes to a sofa, I suggest going with neutral coloured fabrics made of material that will hold up well over time.
Above is the The Stylus Lyric Sofa which would work perfectly in our example space and is available at retailers across Canada. The price is around $1100.00 depending on the fabric you choose.

Step 4- Selecting a chair.

In terms of chair(s), you want something that co-ordinates well with your sofa i.e., they do not have to match but it is okay if they do. This may be a good place to bring a new texture into your space e.g. leather or rattan.


Above is the New Havana Chair from Crate and Barrel which co-ordinates well with the example sofa. The price is $599, the cushion cover is 100% cotton and the wooden legs are in a deep mahogany finish.

Step 5- Area rugs.

Anyone can add an area rug- even if your room has boardloom. In that case, my only suggestion would be to use a rug that is either patterned (if your boardloom is not and vice versa) or a different material (e.g. rattan). I prefer when a rug is large enough that all pieces are at least partially (front legs) on top of it.
Above is the Egeby flat, woven rug from IKEA. The price is $89.99 for a 6'5" x 4'4".

Step 6- Tables.

When it comes to buying the tables for a room their are many ways you can go. My feeling is just to go with the styles you like that fit with the way you intend to use the space i.e., if you intend to do a lot of entertaining, you may want more tables with a larger surface area for guests to put their food and drinks.

Above is an occassional table similar to one found at Walmart (I was surprised too!). The price is $99.99 and it is made of solid wood in a dark espresso finish.

Above is the Hemnes coffee table from IKEA. The price is $199.00 and it is made of solid wood in a black-brown finish.

Step 7- Large and small accessories.

The accessories in a room are called that for a reason- they are the extras that help bring the room together and make it feel comfortable. My only suggestion here is to choose things that ;

1) you like

2) fall within your colour scheme

3) in addition to looking nice, serve a practical purpose e.g. a white throw blanket- looks nice on the back of your chair during the day but can be used to cover up with in the evening.

I think that pretty much covers everything...

FYI-This was the most time consuming poste I have written to date making it very obvious why professional designers exist.

Sunday, September 26, 2010

Decorating Your Living Room- Part 1

I have read enough magazines and watched enough shows to know that their are a few key steps/elements to successfully decorating a space.

Lets say, for example, that your space is an open concept living room/dining room and kitchen with a taupe wall colour (which you love).

It has 2 flooring types- carpet- that is in a similar but darker shade of the same taupe colour and ceramic tile.


The kitchen has traditional cabinets in a cream colour.
Step 1- Considering the fixed elements in your space (i.e., floors, walls, kitchen, etc.) find a colourful fabric(s) that you love which coordinates with all of these.
Everyone wants their home to have colour, but knowone wants to commit to any one colour for too long. The solution- colour should be brought into a room through elements that are inexpensive and easily changed e.g. pillows.

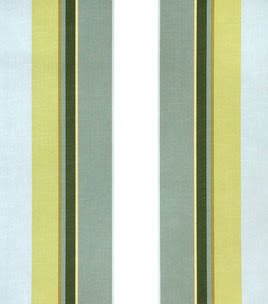
I did a quick search of the Jo-Anne Fabrics website and below are some of the fabrics that caught my eye and would go very nicely in our example open concept space.


Step 2- Draw a layout for your room considering what you intend to do with the room i.e., if entertaining is important to you, you should allow for lots of seating in your layout, etc. This can be a bit intimidating for someone with a completely blank slate, so begin by identifying the necessary pieces (e.g. sofa, chair(s), table(s), etc.).

Below is an example of a basic layout for the living room of our example open concept space.
Once you have established the basic pieces, you can then add the "accessories".

Now it is time to shop... to be continued.

Monday, August 9, 2010

Can't leave well enough alone...

Needlesstosay I made the trip to our Montreal apartment this weekend and made some changes. I felt that certain areas were still lacking in something... so my goal was to try and figure out what.

To start- the bedroom is large and does not have a lot of furniture in it. We essentially only had a bed, 2 end tables and a vintage trunk to put in it. All our clothes fit in the surprisingly large walk in closet so a dresser wasn't necessary. Basically what I did was create a faux headboard (with paint and mdf) and add 2 IKEA frames with pictures I tore out of an art book that I bought for $1. I believe this creates a sufficient focal point for a room this large. I also made some pretty pillows for the bed.

The only problem I still have with the room is the horrible mini blinds on the enormous window that everyone can see in at night. I'm thinking sheers (which I don't normally like) to diffuse some of the view... both in and out.


The kitchen has come a long way from when we first saw the apartment. This trip involved hanging 3 pictures in what I can only call an awkward corner. I think the fabric mats really add interest to a very empty wall. I think I can officially say that I am finished decorating the kitchen.


The bathroom- I added a few finishing touches to the small space. The 3 pictures distract your eye from the tiny window and the polished chrome towel bar and towel ring (not shown) add some sparkle to a very plain bathroom.


Lastly I decided to re-arrange the living room. The chair in the middle of the room seemed to divide the space too much. We moved the chair to the other side of the room and moved the seating arrangement down about 2 feet to take better advantage of the large room. I'm thinking the living room is also finished! The dining room is another story.